Connect ClickUp
To connect ClientFlow to your ClickUp account, start by navigating to ClientFlow > Settings in your WordPress dashboard. Enable the integration by checking the box labeled "Activate ClickUp". This will unlock the necessary configuration options in the next step.
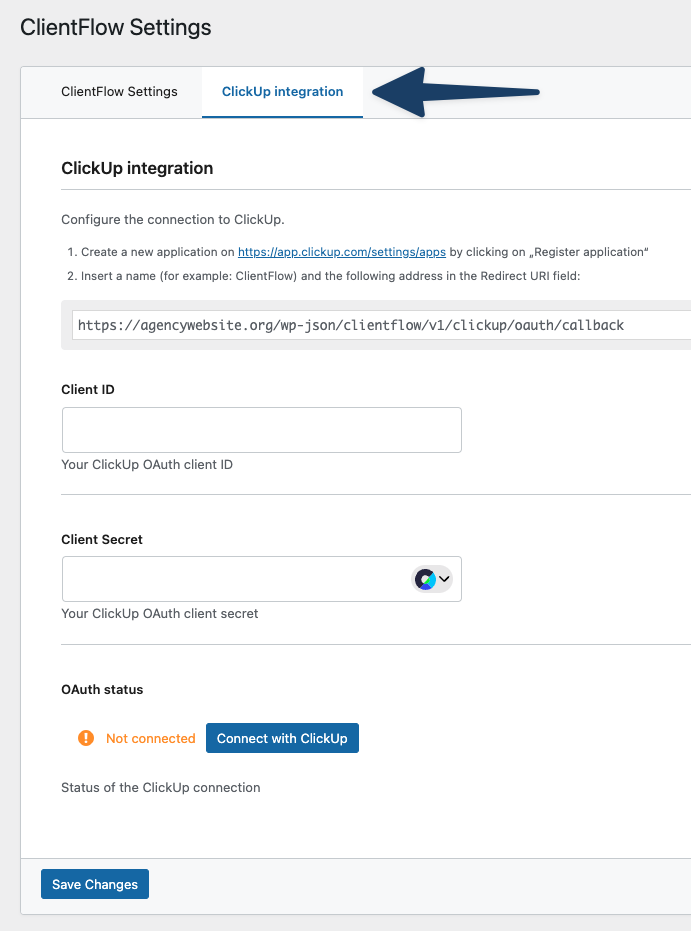
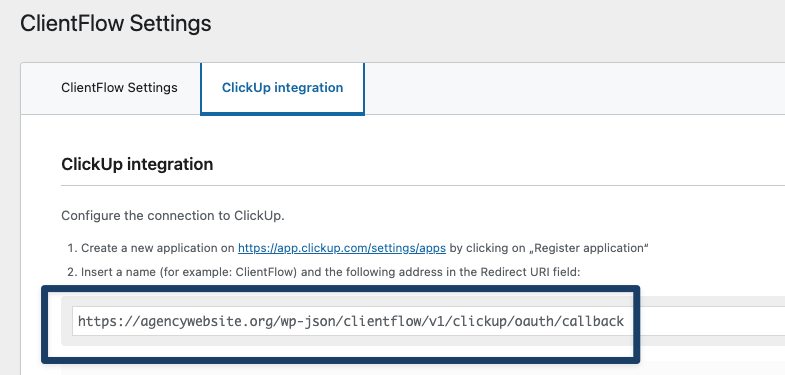
Next, go to the "ClickUp Integration" tab. To allow ClientFlow (Master only) to access your ClickUp tasks and projects, you’ll need to create an application in your ClickUp account. You’ll find a direct link in the settings that will take you to the ClickUp developer console.
After logging in to ClickUp, click on "+ Create New App". This will open a form where you can provide the details for your new app.
We recommend naming the app "ClientFlow Master" so you can easily recognize it later. In the Redirect URL field, paste the URL that’s displayed in your ClientFlow settings page.
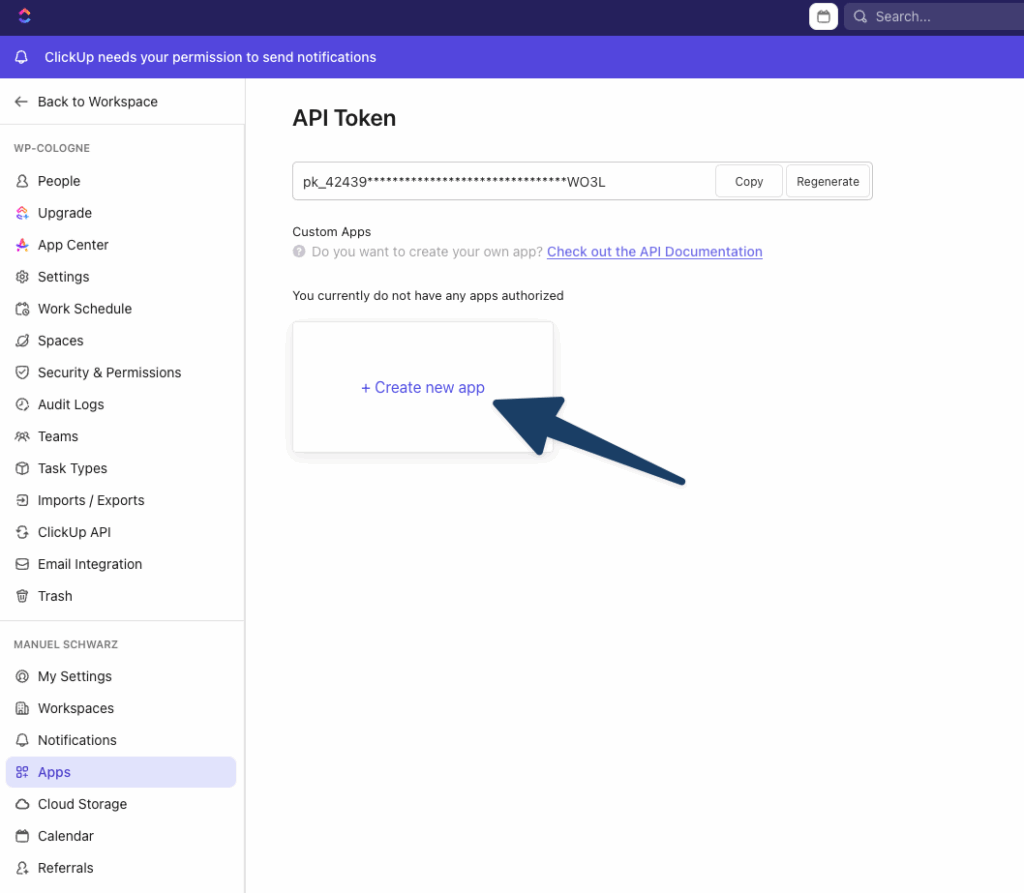
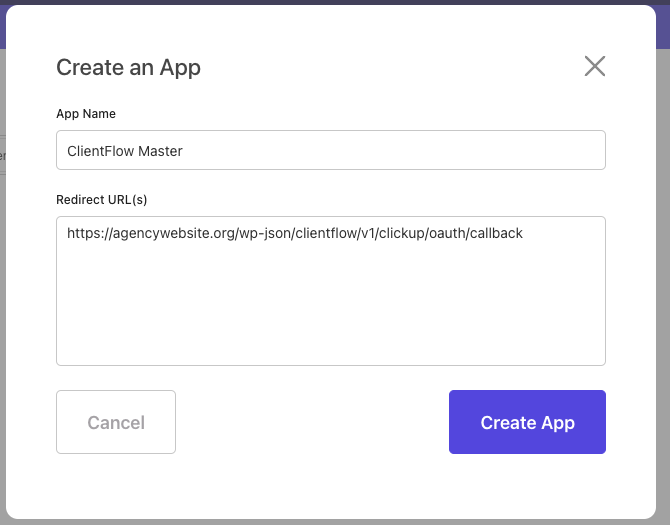
Once everything is filled out, click "Create App". You’ll now see your app’s Client ID and Client Secret. Copy both values.
Return to the ClientFlow settings in your WordPress dashboard and paste the Client ID and Secret into their respective fields. Be sure to click "Save Changes" to store your credentials.
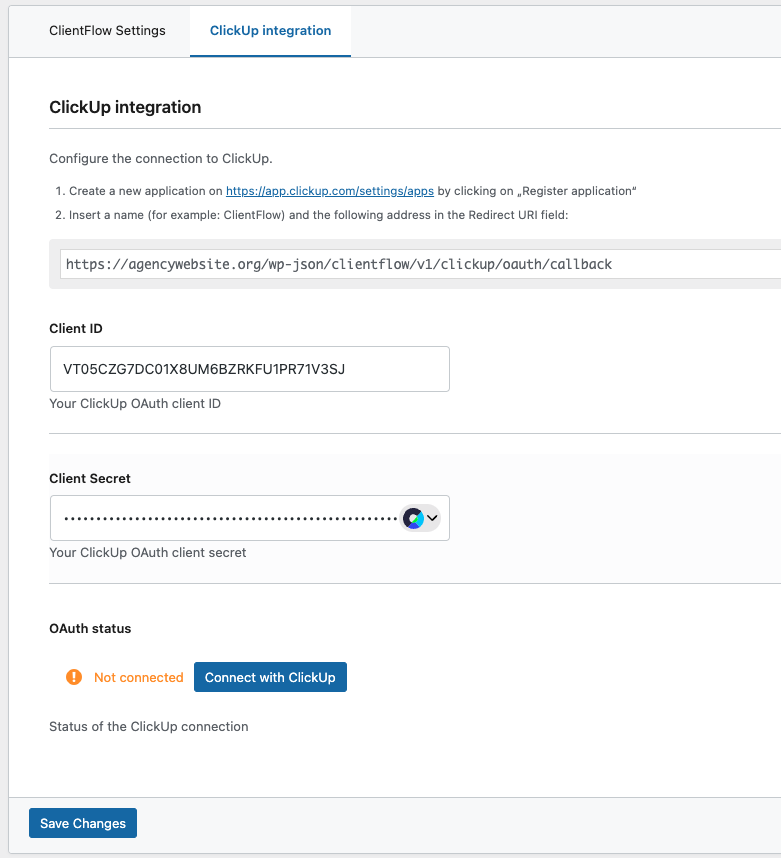
After saving, a new section called OAuth will appear. Click on the "Connect with ClickUp" button to begin the authentication process.
You’ll be redirected to ClickUp where you can log in and select the Workspace you want to connect. Click "Select Workspaces" to confirm your choice.
Success: Your ClientFlow instance is now connected to ClickUp and ready to sync tasks and projects.