Assign a Basecamp Projekt with a Website
Before assigning a Basecamp project to a client website, make sure that your Basecamp integration is already set up in your ClientFlow Master instance. If not, please refer to the section “Connect Basecamp”.
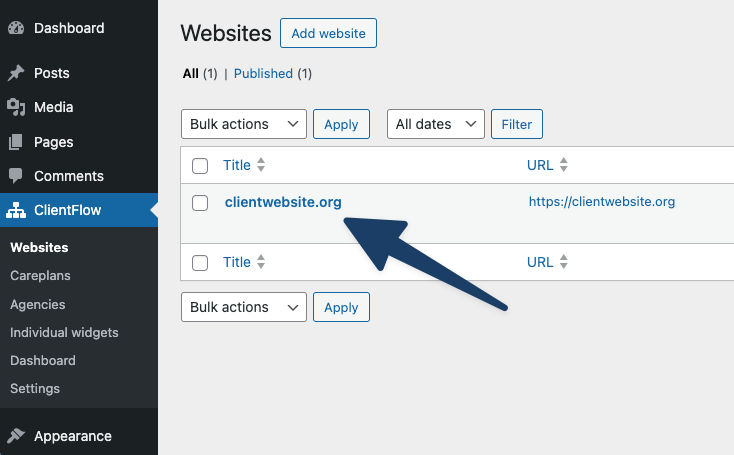
To begin, go to ClientFlow > Websites in your Master site and open the website you want to connect to a Basecamp project. If you haven’t added the website yet, read this first.
Scroll down to the section labeled Basecamp Settings. Here you can select the Basecamp project that should be linked to this website.
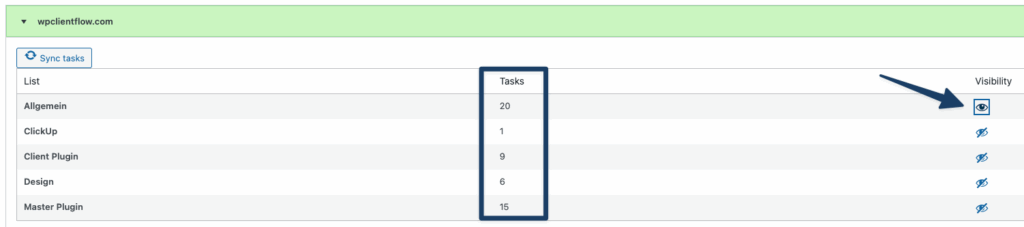
Below that, you’ll see the option "Which To-Do Lists should be synchronized?". You can choose between syncing only the lists shared with your client, or syncing all lists from the Basecamp project.
Note: If you select "All", tasks from lists not shared with clients will be synced to the Master instance but won’t appear in the client dashboard by default. You can manage their visibility under ClientFlow > Dashboard by clicking the eye icon next to each list.
You can also define where client-created tasks should be stored. To enable this functionality, make sure the following fields are configured:
Basecamp To-Do Settings
- Basecamp TodoSet: Select the appropriate ToDo Set that contains the lists you want to use. Most setups have only one, but ClientFlow supports multiple sets.
- Basecamp TodoList: After selecting a TodoSet, all associated lists will be loaded in the background. Once ready, choose the list where client tasks should go.
- Assigned User: Once a list is selected, users with access to that list will be loaded. Choose the default user who will be assigned to tasks submitted via the client dashboard.
- Default Due On Date: Define how many business days (Monday to Friday) from today the task deadline should be set to by default.

Client Plugin Behavior
Once everything is configured in the Master plugin, the Client plugin will automatically pull in the related Basecamp information.
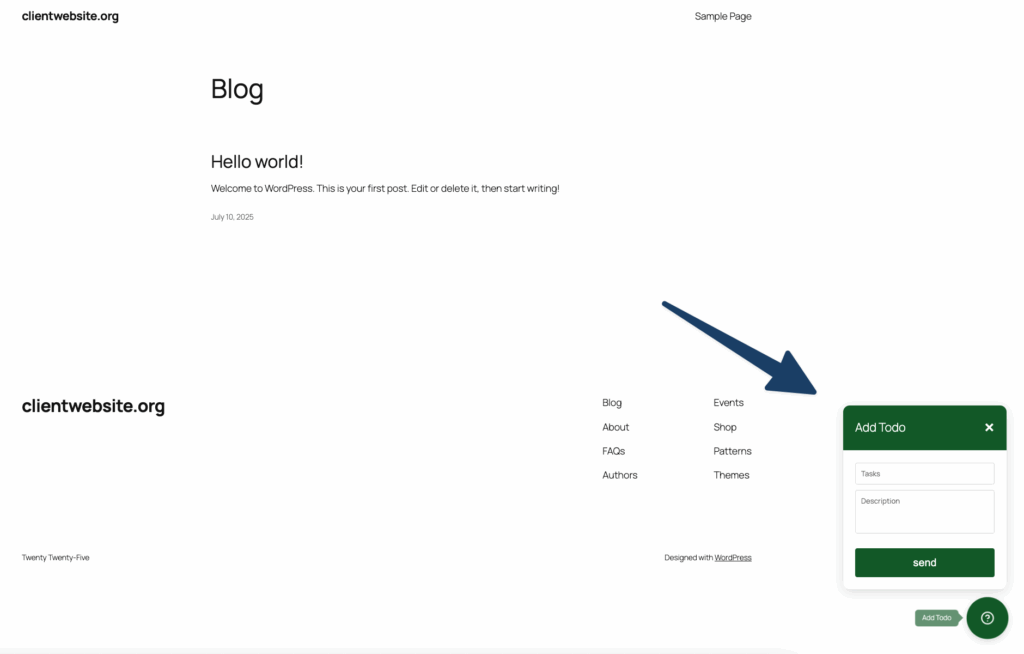
If you are using standard WordPress widgets, the “ClientFlow Todos” widget will appear by default. It shows all assigned tasks and allows clients to add new tasks.
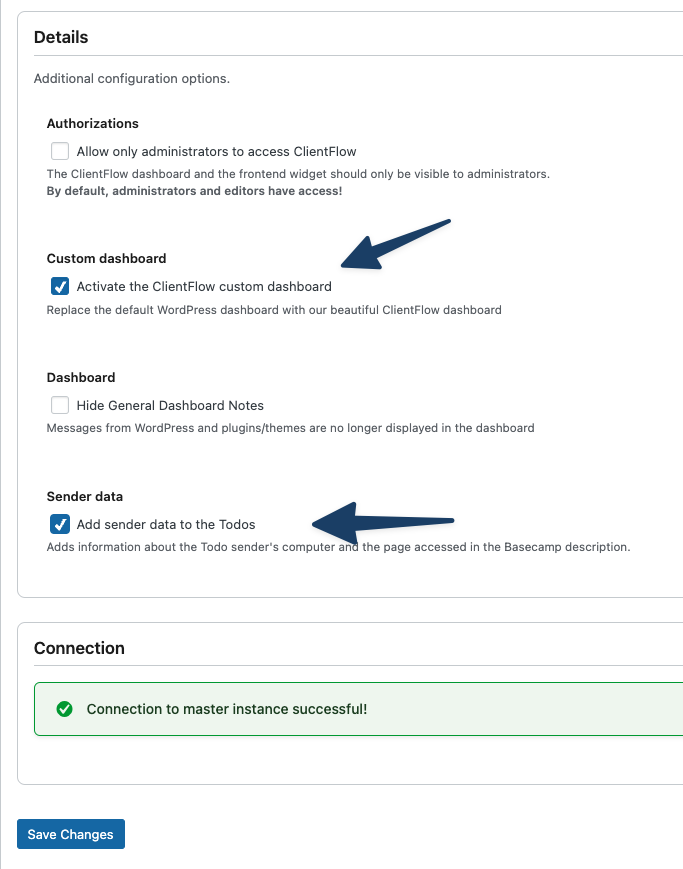
If you have enabled the custom dashboard via ClientFlow > Settings > Custom Dashboard, the tasks widget will also appear there automatically.
You can define how many tasks are shown by default using the "Tasks amount" setting under ClientFlow > Settings.
If the "Show widget in frontend" option is enabled, logged-in users on the client site will also see a frontend task widget to create Basecamp tasks directly.
Automatically Add Sender Info
ClientFlow can automatically add useful metadata to each submitted task — such as the current page URL, the user’s name, screen resolution, browser, and language.
To enable this, simply check the option "Add sender data to the Todos" in the plugin settings.